- Install Windows Server 2012 with all of the Windows Updates and add it to the Domain. Refer to Step-By-Step Screencast of Installing Windows Server 2012
- Install Updates
- Add to the Domain
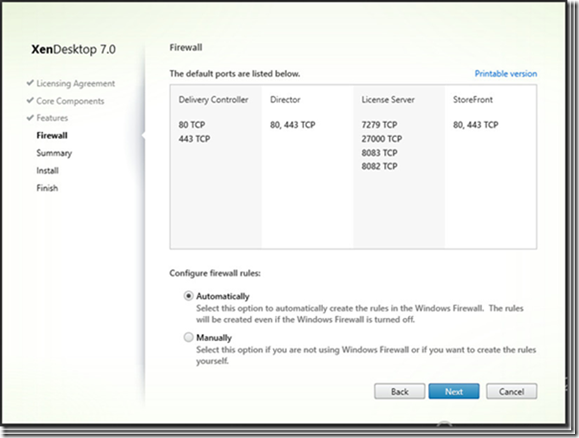
- The XenDesktop installer will take care of installing all of the pre-requisite software on the server along with enabling the required Server Roles and Features.
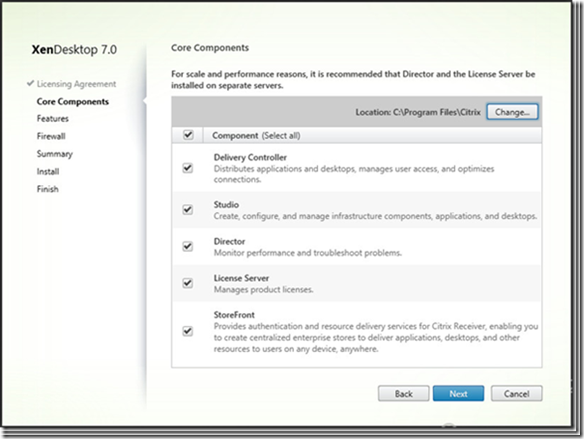
- Install XenDesktop 7 with all of the features on the same server. Refer to Installing Citrix XenDesktop 7 on Windows Server 2012
- Configuring XenDesktop Components: via Citrix XenDesktop Studio
- Create a new XenDesktop Site
- Install XenDesktop Server License on Controller server, refer to Configuring Licensing section in Configuring XenDesktop 7 on Windows Server 2012
- Setup a Connection to Hosting Hypervisor
- Prepare a Master VM
- Create a VM with all required settings and environment that is going to be used as Master Image for Machine Catalog in XenDesktop
- Update/Configure the Network configuration to be able to access the Domain as well as Delivery controller systems
- Install Hypervisor Tools (VMware/Xen Tools)
- Join to a Domain
- Install VDA and Citrix Receiver
- Shutdown the VM
- Create a Snapshot of the VM
- Keep this Master Image VM in shutdown state
- Refer to Preparing Master VM Image on VMware for XenDesktop 7
- Create a Machine Catalog by choosing the previously created Master Image VM
- If you are planning to use NetScalar for your networking and Firewall setup, you need to have it now ready so that youcan configure it in your StoreFront, otherwise you can specify it at a later point
- Create and Configure StoreFront site, Refer to Configuring Citrix StoreFront for XenDesktop 7 on Windows Server 2012
- As part of which you’ll be installed Citrix Receiver
- If you are to access/test XenDesktop session from the same server you’ll need to have the StoreFront site added to IE trusted sites list so that it’ll be able to run the JavaScripts
- Have appropriate Active Directory infrastructure setup like OU to store the computer Objects, Users accounts and a group account who going to access the created VMs
- Create Delivery Group
- choose the Catalog to be used
- assign the users group
- link the access to the StoreFront site
- Users will login from the StoreFront web store site and can start using the resources assigned for their login
- Setting up connection to VMWare ESXi 5.1.0 with vSphere 5.1.0
- In order to establish a connection from XenDesktop 7 running on Windows Server 2012 to VMware Host running ESXI 5.1.0, you need to allow both HTTP and HTTPS access using below given steps:
- SSH to the vCenter, use WinSCP for GUI based access
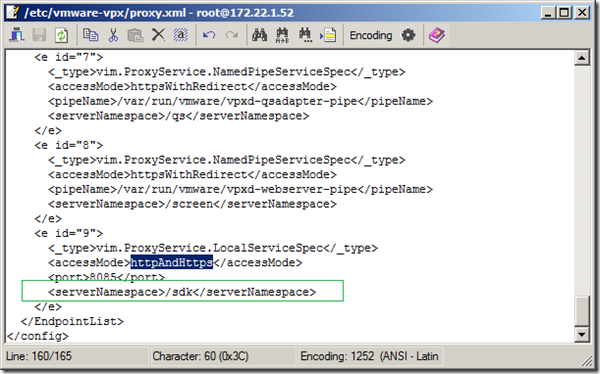
- Edit the File /etc/vmware-vpx/proxy.xml
- Replace httpsAndRedirect with httpAndHttps for SDK XML tag
- Refer to Fix: Cannot connect to the VCenter server due to a certificate error for detailed list of issues that may arise otherwise.
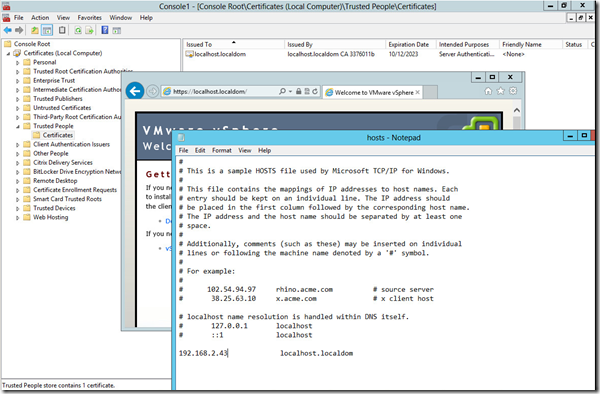
- Ensure proper DNS access to the vCenter system from XenDesktop Controller server so as to make sure the web based SSL access works in order to establish the secure communication channel.
- Add the SSL certificate of the vCenter server to the Trusted People list for both Local Computer as well as Current User on XenDesktop 7 Controller Server
- To find the certificate navigate to the https://vCenter/
- Choose Copy to File option in Details of the certificate
- Open MMC, load Certificates for both Local Computer as well as Current User
- Navigate to Trusted People > right and Import and browse to the certificate file and click import
- Upon successful import you’ll see the certificate as shown below

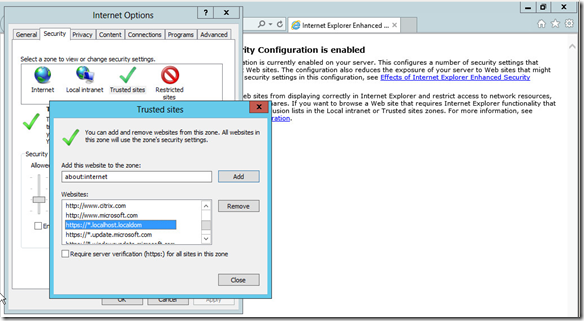
- On the XenDekstop 7 Controller server, add the vCenter server URL to the Trusted Sites list. In my lab my vCenter server is localhost.localdom
- d
- g
- In order to establish a connection from XenDesktop 7 running on Windows Server 2012 to VMware Host running ESXI 5.1.0, you need to allow both HTTP and HTTPS access using below given steps:
- g
- fg

