A Step-by-Step Procedure for Installing and Configuring XenApp 6 on Windows Server 2008 R2
Best Practices:
- Do Not install XenApp 6 on
- Domain Controller (it’s not supported)
- SQL Server (installs but is not recommended)
- Do Not join XenApp 6 into a older version XenApp Farm
- Recommendations
- use server hardware with high performance disks for faster responses
- use a separate hard disk for hosting Operating System so that you can easily recover from disk/OS failures
- use raid configured disk arrays for XenApp drives to tolerate/quickly recover disk failures
- install XenApp only on a Freshly build server (in case of reinstall, ensure you rebuild the server and only then install the XenApp)
- use fully activated, patched/updated Windows Server 2008 R2 server
- always use the same user credentials if you are resuming the installation, otherwise installer may fail as detailed in the article XenApp 6 Server Role Manager Displays Blank Installation List
- Refer to Configuring XenApp Using the Wizard-based Server Configuration Tool for textual description steps by Citrix.
Installation ScreenCast:
Installing XenApp
- Installer Starts with below Main Options

- View XenApp Documentation
- Install XenApp Server
- Manually install components
- Applications on Virtual Machines
- Clicking on “View XenApp Documentation” takes to the this link as shown below.

- Clicking on “Install XenApp Server” launches the options to install XenApp Server Roles on Windows Server 2008 R2 server as shown below.
 Using below command line
- “D:XenApp Server Setup..XenApp Server Role ManagerStartupStartupIndicator.exe” .XenAppServerRoleManager.exe which then runs below process
- D:XenApp Server Role ManagerXenAppServerRoleManager.exe
- Clicking on “Add Server Roles” launches the “XenAppServerSetup.exe” wizard
- Choose the XenApp Edition among the available options listed below for which you’ve got the license and that meets your environment requirements. I am choosing Platinum Edition so that we’ll get across all the available features in XenApp

- Platinum Edition
- Enterprise Edition
- Advanced Edition
- Now the XenApp actual installation starts. Accept the “License Terms and Conditions” and click next

- Choose XenApp roles from the available roles listed below

- Common Roles
- License Server
- XenApp
- Web Interface
- Merchnadising Server (This is a virtual appliance and requires a virtual machine)
- Other Roles
- Single Sign-on Service
- Secure Gateway
- Power and Capacity Management Administration
- EdgeSight Server
- Provisioning Services
- SmartAuditor Server
- Common Roles
- I am choosing the first three Common Roles as shown below

- Select additional/Optional subcomponents if any for each of the roles you chose

rder=”0″ alt=”image” src=”http://gunnalag.files.wordpress.com/2011/07/image_thumb70.png” width=”600″ height=”511″ />
- Review the pre-requisites that will be installed


- Review the categories of components and pre-requisite software that’s going to be installed
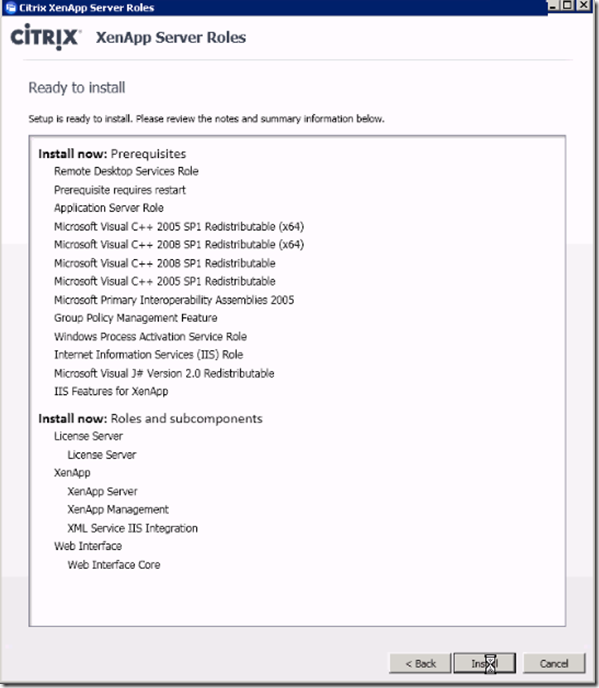
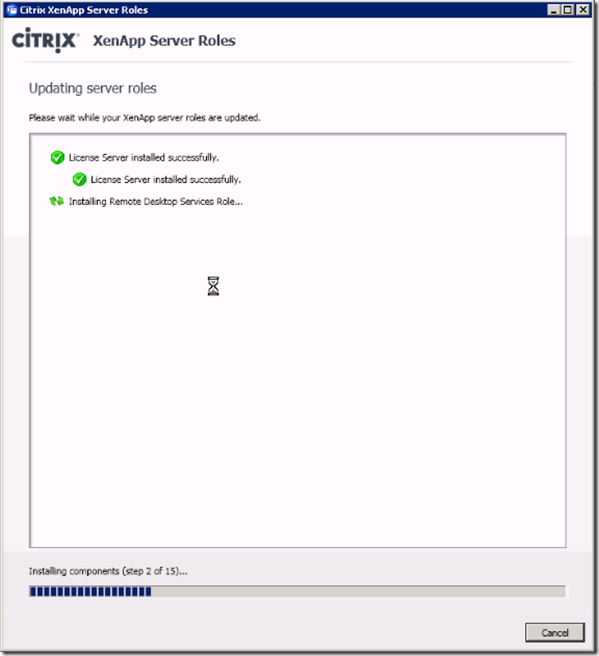
- Click Install and wait for the completion of all components installation
Configuring XenApp 6
- Once all the components install is completed, you’ll be presented with XenApp Components configuration wizard. You can run the configuration wizard anytime

- Upon clicking XenApp Configure option, you’ll be presented with “Citrix XenApp Server Configuration” wizard with below listed options
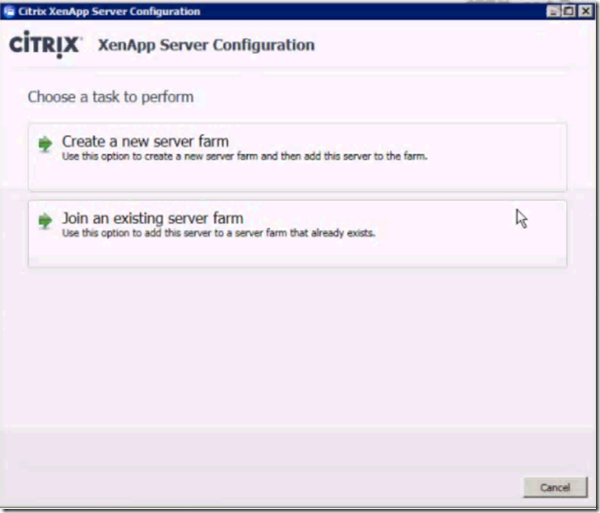
- Create a new serer farm
- Join an existing server farm
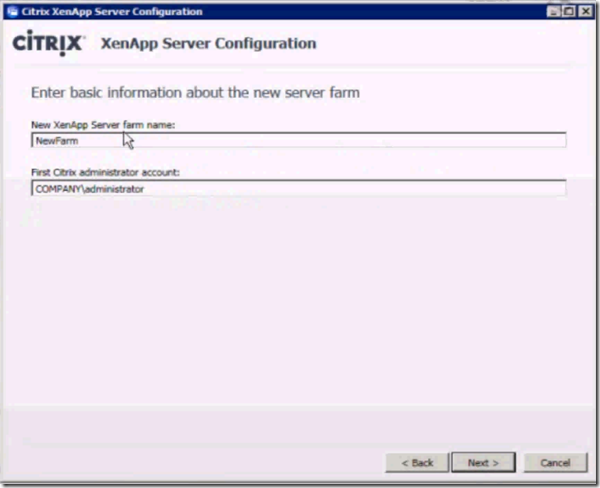
- Choose “Create a new serer farm” if you are setting up a fresh/new XenApp environment & provide the required details as shown below
- Provide the Licensing Server details in the next screen. If you haven’t already have a license server setup choose the option to specify it later as given below

- Choose the DB type for the Data Store setup

- Specify (or select from the drop down list) the local/Remote SQL DB along with instance name if any. You need to have a SQL DB created manually on the SQL server for wizard to verify the connectivity in next screen

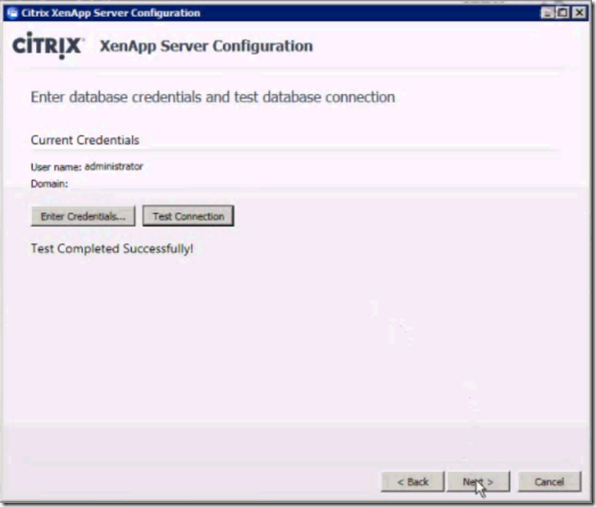
- Enter the SQL DB Credentials and verify the connectivity to DB
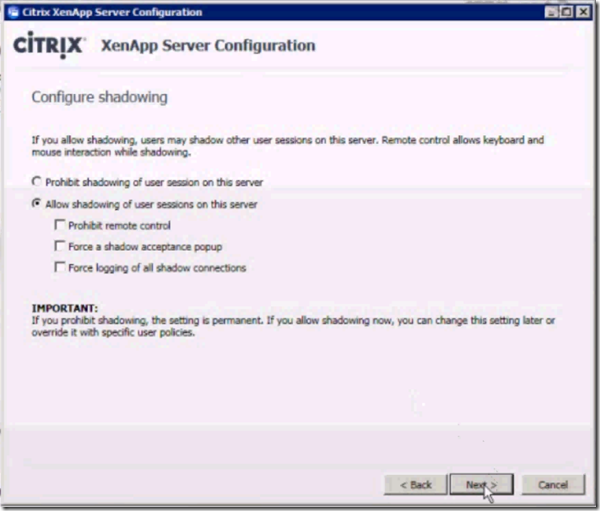
- Choose enable or disable choice for Shadowing option. It’s recommended to have this enabled but not configured since this options can’t be enabled later
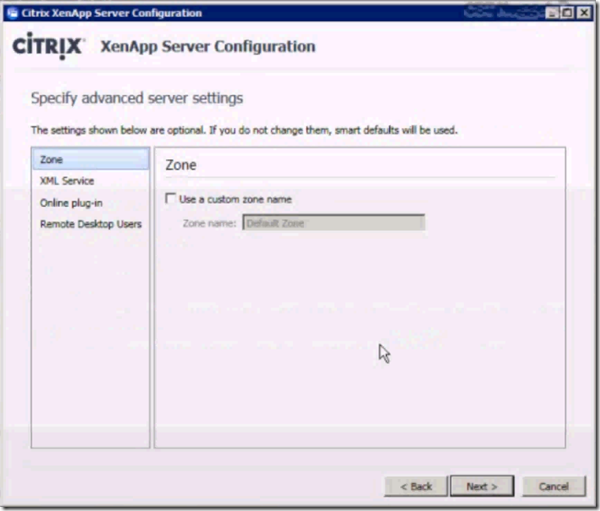
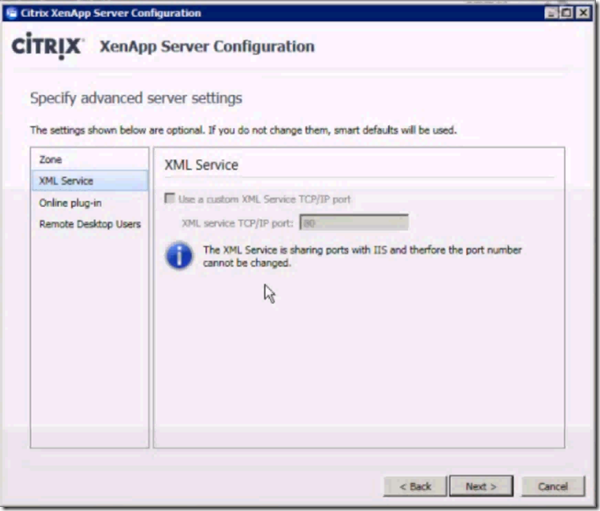
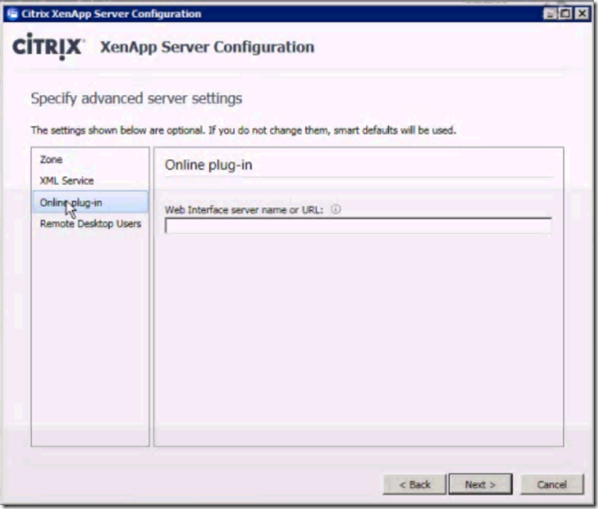
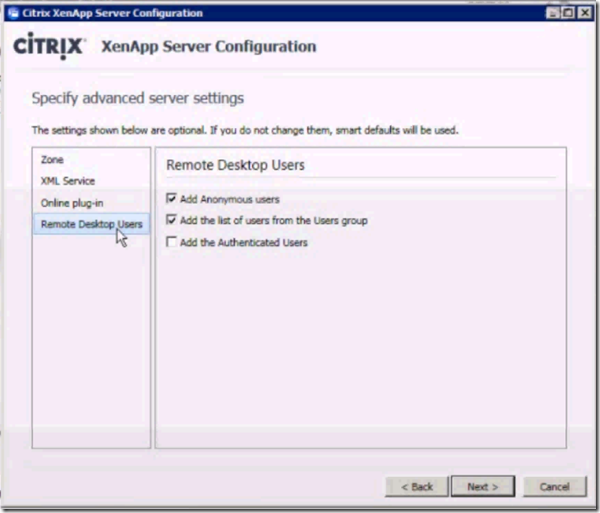
- Provide the “XenApp Advanced Server Confgiruation” for below listed options
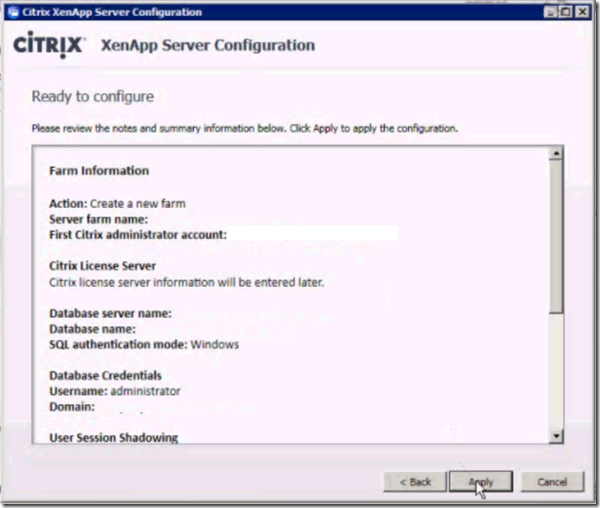
- Review the Farm setup configuration and press Apply if all settings are correct
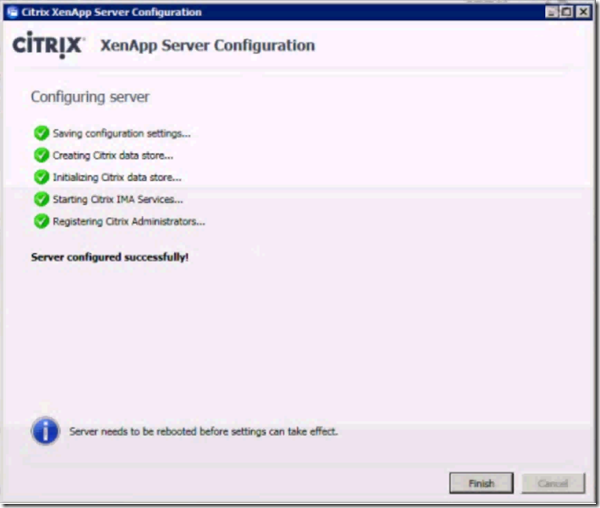
- Let the XenApp 6 to complete with it’s configuration and click Finish once it completes successfully


0 thoughts on “Step-by-Step Procedure: Installing and Configuring XenApp 6 on Windows Server 2008 R2”
Hey, would doing all these via a RDP connection be a problem? Would /admin help?
SAM,
A regular RDP session should just work as long as you have proper access rights and UAC configured on that server. However, if you have ability to do it via Console/ILO/admin session that would be more assuring and voids any other issues around.